


Views: 0 Author: Site Editor Publish Time: 2026-08-05 Origin: Site


Achieving predictable proximal contacts remains a persistent clinical challenge in restorative dentistry. When contacts are left open, deficient, or excessively tight, patients experience food impaction, localized periodontal inflammation, and secondary caries. Beyond biological consequences, unpredictable contacts create friction in daily practice operations. Time spent grinding, polishing, and repeatedly trying in restorations translates directly into increased chair time, elevated remake rates, and diminished clinical efficiency. The core problem lies in the disconnect between ideal laboratory fabrication on a static model and the dynamic intraoral environment.
To bridge this gap, clinicians must move away from subjective tactile assessments and adopt a standardized, evidence-based framework. By systematically evaluating, adjusting, and cementing custom dental restorations, practitioners can ensure reproducible, stable proximal contacts that maintain the structural integrity of the restorative material while promoting long-term periodontal health.
Material-Specific Tolerances: Different custom dental restorations (e.g., custom zirconia restorations vs. feldspathic porcelain veneers) require distinct adjustment protocols to prevent micro-fractures and maintain structural integrity.
Standardized Evaluation is Critical: Moving away from subjective "floss drag" tests to reproducible, evidence-based assessment methods (e.g., quantitative shim stock gauges, standardized ultra-thin diamond strips) reduces seating errors.
Preparation and Lab Communication: Stable contacts begin at the preparation phase—specifically opening contact points to accommodate matrix systems and employing clinical techniques like pre-wedging for orthodontic separation—and depend on precise digital or analog communication of the patient's DMF (Decayed, Missing, Filled) index and periodontal phenotype.
Cementation Risks: Improper handling during the cementation phase is a primary cause of altered proximal contacts; strict isolation, protection of adjacent surfaces, and controlled seating forces are mandatory.
A clinically acceptable proximal contact is a precisely contoured three-dimensional area, not just a point where two teeth touch. Anatomically, the contact area should sit in the occlusal or middle third of the proximal surface, depending on specific tooth morphology. The size and contour of this area dictate how food deflects during mastication and how the interdental papilla receives support. A broad, flat contact prevents food impaction but restricts the embrasure space, strangulating the papilla. A pinpoint contact allows fibrous foods to wedge between the teeth.
The integrity of these contacts links directly to the patient's individual DMF index and baseline periodontal health. Patients with a high DMF index or compromised periodontal phenotypes require highly customized emergence profiles to facilitate interproximal hygiene. Establishing stable contacts between direct restorations, such as posterior composite resins, and indirect prosthetics presents a unique clinical challenge. Composite resin lacks the rigidity of ceramic, leading to differential wear and eventual contact opening if restorative contours are not perfectly harmonized.
We must also consider the specific anatomical variations between anterior and posterior teeth. Maxillary central incisors demand a longer, more incisally positioned contact area to prevent black triangles, whereas maxillary molars require a broader, more middle-third contact to withstand heavy occlusal loads. Failing to replicate these natural anatomical nuances during the fabrication of indirect restorations guarantees functional and aesthetic failure.
When proximal contacts fail to meet clinical standards, financial and biological costs mount rapidly. Chairside adjustments act as overhead multipliers. Spending an extra fifteen minutes adjusting a tight contact, re-polishing the ceramic, and re-evaluating the fit disrupts the daily schedule and reduces overall practice efficiency. If the contact opens inadvertently during this process, the restoration must return to the laboratory, triggering a remake cycle that frustrates both clinician and patient.
Biologically, the cascade of an open contact is devastating. It begins with interdental papilla blunting as food continuously drives into the col area. This localized trauma initiates an inflammatory response, leading to vertical bone loss and periodontal pocket formation. Over time, chronic food impaction and an altered microbial environment increase susceptibility to root caries on adjacent natural teeth, ultimately threatening the survival of the restoration itself.
Consider the workflow disruption. A single remake due to an open contact requires a new impression or scan, a temporization appointment, lab fees, and a second delivery appointment. This completely negates the profit margin of the procedure. Precision in the initial contact assessment is non-negotiable for practice sustainability.
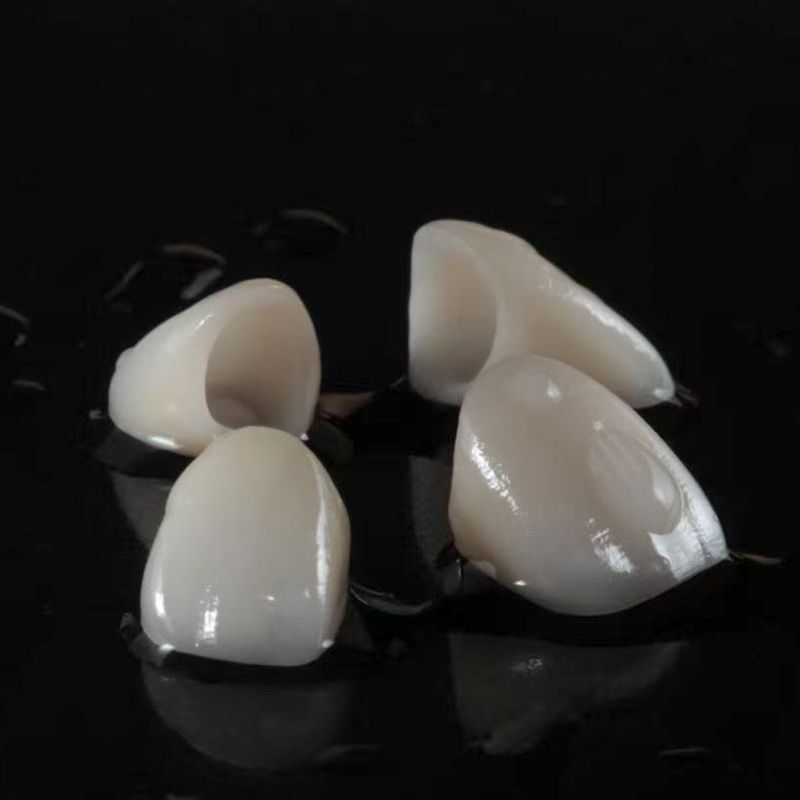
Material selection dictates the chairside adjustment protocol. Monolithic zirconia and lithium disilicate glass-ceramics possess vastly different microstructural properties and adjustment thresholds. When seating custom zirconia restorations, clinicians must recognize that while the material is highly fracture-resistant, aggressive grinding with coarse diamonds induces phase transformations and micro-cracks that compromise long-term strength. Adjustments must happen with fine-grit diamonds under copious water coolant.
Post-adjustment polishing sequences are equally critical. Unpolished zirconia is highly abrasive and rapidly wears opposing or adjacent natural dentition. A meticulous polishing protocol using specialized diamond-impregnated rubber wheels and points is mandatory to achieve a surface smoothness that mimics glazed ceramic. This ensures the proximal contact remains passive and non-destructive to adjacent tooth structure.
Lithium disilicate, while more aesthetic, is more brittle during the try-in phase. Adjusting a lithium disilicate contact requires a feather-light touch with extra-fine diamonds. Heavy pressure will cause chipping at the marginal ridges. The polishing protocol for lithium disilicate involves a step-down approach with silicone polishers, ensuring the crystalline structure remains intact while achieving a high gloss.
Implant prosthetics introduce unique biomechanical challenges due to the absence of the periodontal ligament (PDL). Natural teeth exhibit physiologic mobility and proprioception, allowing them to adapt to occlusal forces. Implants are ankylosed. When designing custom implant restorations, the lack of PDL means any excessive pressure on the proximal contact during seating displaces the adjacent natural tooth rather than the implant. This results in an artificially tight contact that feels acceptable at try-in but opens once the natural tooth rebounds.
Clinicians must anticipate mesial drift. Over time, natural teeth migrate mesially, while the implant remains stationary. This inevitably leads to interproximal contact loss, most commonly on the mesial aspect of the implant restoration. Designing implant crowns with slightly broader, meticulously contoured proximal surfaces helps mitigate the rapid onset of this contact loss, though long-term monitoring remains essential.
The emergence profile of the implant crown also plays a massive role in contact stability. A concave emergence profile allows for greater soft tissue volume, supporting the interdental papilla and preventing food impaction even if minor contact loss occurs over the years. Over-contoured emergence profiles displace tissue and create hygiene traps.
In the anterior esthetic zone, managing proximal contacts during veneer preparation requires strategic decision-making. Clinicians weigh trade-offs between breaking the contact to allow complete coverage and hiding the restorative margin, versus maintaining the contact to preserve tooth structure and simplify bonding. When contacts remain intact, preparation margins often end in ultra-thin enamel.
During the try-in phase, custom porcelain veneers are exceptionally fragile. Forcing a veneer through a tight interproximal contact without adequate relief will almost certainly result in fracture. Clinicians must use extreme care, utilizing ultra-thin diamond strips to gently relieve the adjacent natural tooth or the veneer itself, ensuring a passive path of insertion before initiating adhesive procedures.
When breaking contacts for veneers, the lab must recreate the entire proximal surface. This requires precise communication regarding the desired length and broadness of the contact to prevent black triangles. The technician needs clear instructions on where the contact should begin and end relative to the gingival zenith.
Proximal contacts are vital in removable prosthodontics. The stability and retention of a partial denture rely heavily on the interaction between the prosthetic framework and adjacent natural teeth. Proximal contacts and specifically designed guide planes dictate the path of insertion. If contacts are too tight, the prosthesis will not seat; if too loose, the denture lacks stability and allows food entrapment.
When integrating fixed restorations with custom removable dentures, fixed crowns must be milled or contoured to provide a precise frictional fit with the removable framework. This requires exact parallelism of guide planes. Any discrepancy in the proximal contact area generates excessive lateral forces on abutment teeth during insertion and removal, potentially leading to mobility and premature failure of the abutment.
Survey crowns must be designed with the final removable prosthesis in mind. The proximal contact of the survey crown must align perfectly with the minor connector of the partial denture. This requires a coordinated digital or analog workflow where the lab designs the crown and the framework simultaneously to ensure zero tolerance for error at the contact interface.
The foundation of a stable proximal contact establishes long before the restoration is milled or pressed; it begins during the preparation phase. In posterior preparations, opening the contact points fully is a clinical necessity. Failing to break the contact leaves insufficient space for matrix bands, impression materials, or the light beam of an intraoral scanner to capture critical cervical margin data accurately.
To facilitate this and ensure tight post-restorative contacts, clinicians employ pre-wedging techniques. Forcefully inserting a wooden or plastic wedge into the interproximal space prior to initiating preparation achieves immediate and temporary orthodontic separation. This separation compensates for the thickness of the matrix band used during core build-ups or direct restorations and provides the laboratory with a slightly expanded interproximal space, resulting in a more robust contact upon final seating.
Pre-wedging also protects the interdental papilla and the adjacent tooth from iatrogenic damage during bur manipulation. By compressing the tissue and physically separating the teeth, the clinician gains a clear, unobstructed view of the proximal margin, allowing for precise finish line placement without gouging the neighboring enamel.
The traditional method of evaluating proximal contacts by assessing "floss drag" is highly subjective and prone to error. Floss can shred, stretch, or slip past a deficient contact, providing false reassurance. To achieve reproducibility, clinicians must transition to objective assessment tools.
A standardized protocol involves using shim stock foil, typically ranging from 8-micron to 12-micron thickness. The shim stock should pull through the contact with firm resistance but without tearing. Articulating paper marks the exact location and size of the contact area on the restoration. Visual inspection is paramount; marginal ridges of the restoration must align perfectly with adjacent teeth to prevent food impaction and ensure occlusal harmony.
When using shim stock, the patient should be in an upright position, as postural changes can slightly alter mandibular flexure and tooth position. The clinician should test the contact with the adjacent teeth dry, as saliva acts as a lubricant and can give a false sense of a loose contact. Consistent testing methodology yields consistent clinical results.
When adjustments are necessary, a systematic approach prevents over-reduction. Definitive interproximal relief should be achieved using ultra-thin diamond dental strips for minor discrepancies, or specialized fine-grit rotary instruments for larger adjustments. The sequence of adjustment is critical for clinical success.
Proximal Contacts First: The restoration must seat fully without binding before evaluating any other parameters.
Marginal Integrity: Once contacts are passive, check margins for complete seating and adaptation.
Occlusion Last: Only after the restoration is fully seated can occlusal contacts be accurately assessed and adjusted.
Using a dial caliper to measure the exact thickness of the restoration before and after adjustment provides a quantitative safeguard against over-thinning the material, especially in critical areas like the cervical third of a monolithic zirconia crown.
The shift from elastomeric impressions to intraoral scanners transforms how interproximal data is captured. Digital impressions eliminate risks of impression material tearing or distortion in interproximal embrasures. However, scanners require a clear line of sight; if the contact is not adequately opened, the software interpolates missing data, leading to inaccurate contact fabrication.
One primary advantage of digital workflows is the ability to customize virtual contact strength settings. Clinicians request the laboratory to set contact strength to specific parameters, such as +10 to +30 microns, based on clinical preference, restorative material, and the patient's periodontal status. This level of precision is difficult to achieve consistently with traditional analog stone models.
Digital workflows also allow for the superimposition of pre-operative scans. If the patient had an ideal proximal contact prior to tooth fracture or decay, the lab can copy that exact contact morphology and integrate it into the final restoration design, ensuring a seamless transition for the patient's tongue and hygiene habits.
Understanding the laboratory's fabrication process is essential for predictable outcomes. In analog workflows, the difference between a "solid model" and a "sectioned die" significantly impacts contact predictability. Sectioned dies introduce micro-movements, leading to restorations that are slightly too tight or too loose upon delivery. Solid models provide a more accurate representation of the true interproximal relationship.
Workflow Type | Data Capture Method | Contact Adjustment Capability | Predictability of Fit |
|---|---|---|---|
Digital Workflow | Intraoral Scanner (IOS) | Software-driven (+10 to +30 microns) | High (eliminates stone expansion variables) |
Analog Workflow | Elastomeric Impression (PVS/Polyether) | Manual scraping of stone dies | Moderate (dependent on die stability) |
Hybrid Workflow | IOS to Printed Model | Software design + manual verification | High (combines digital precision with tactile checks) |
Best practices dictate that lab prescriptions explicitly state contact preferences. Terms like "broad," "point," "tight," or "passive" must be clearly defined between clinician and technician to eliminate guesswork and ensure the delivered restoration meets clinical expectations.
The most common pitfall during the try-in phase is over-reduction of the proximal surface. In an attempt to seat a tight crown quickly, a clinician aggressively grinds the contact, resulting in a restoration that drops into place but leaves a visually open contact or one that fails the shim stock test.
Mitigation strategies depend on the material. If a feldspathic or lithium disilicate restoration is over-adjusted, it can often be salvaged by returning it to the lab for the application of add-on porcelains. For certain composite or hybrid materials, direct composite resin can be bonded to the proximal surface chairside. For monolithic zirconia, adding material is highly complex and often necessitates a complete remake, underscoring the need for conservative, incremental adjustments.
To prevent over-adjustment, mark the contact with ultra-thin articulating paper and only adjust the specific high spots. Never sweep a bur across the entire proximal surface. Use a light touch and re-evaluate with shim stock after every single pass of the bur.
A perfectly adjusted contact can be ruined during the final cementation phase. Hydraulic pressure generated by viscous resin cements prevents the restoration from seating completely. Even a discrepancy of 50 microns in vertical seating alters the proximal contact relationship, often leaving it open or misaligned.
To avoid these problems, clinicians utilize holding instruments to apply continuous, controlled seating pressure until the cement begins its initial set. Interproximal isolation using PTFE tape on adjacent teeth prevents cement from bonding to unintended surfaces. Strict tack curing protocols and precise interproximal clean-up prior to final polymerization are mandatory to prevent excess cement from locking the contact and inducing localized gingival inflammation.
Using a micro-brush to sweep away excess cement from the embrasure spaces before the final cure ensures the contact remains clear. Passing a piece of dental floss through the contact while applying apical pressure on the crown verifies that no cement is trapped in the contact area itself.
Implement a standardized chairside adjustment kit containing 8-12 micron shim stock, ultra-thin diamond strips, and material-specific polishing wheels.
Update all laboratory communication templates to explicitly define proximal contact parameters (e.g., broad, tight, +20 microns).
Incorporate pre-wedging as a mandatory step in all posterior preparation protocols to ensure adequate interproximal space.
Train clinical staff on proper isolation and tack-curing techniques during cementation to prevent hydraulic seating errors.
A: Adjustments should be made using fine-grit diamond burs under copious water coolant to prevent heat generation and micro-cracking. Following adjustment, the zirconia must be meticulously polished using specialized diamond-impregnated rubber wheels to achieve a smooth, glaze-like finish that will not abrade adjacent natural teeth.
A: Open contacts post-cementation are typically caused by hydraulic pressure from the cement preventing complete vertical seating, over-adjustment during the try-in phase, or failure to properly isolate and clean excess cement before final polymerization, which can artificially wedge the teeth apart.
A: Because implants lack a periodontal ligament and are ankylosed, they do not move. Natural teeth undergo continuous mesial drift. Over time, this differential movement frequently leads to the opening of proximal contacts, particularly on the mesial aspect of the implant restoration.
A: The most reliable and objective tool is shim stock foil (8 to 12 microns thick). It provides a reproducible, quantitative assessment of contact tightness, eliminating the subjectivity and false readings often associated with traditional dental floss.
A: Yes, if a contact is inadvertently opened during try-in, custom porcelain veneers and other glass-ceramics can usually be returned to the laboratory where a technician can apply and bake add-on porcelain to restore the ideal contact contour without requiring a complete remake.
A: Pre-wedging provides immediate, temporary orthodontic separation of the teeth before preparation. This separation compensates for the thickness of the matrix band used during core build-ups or impressions, ensuring that once the final restoration is seated and the teeth rebound, the contact remains tight and stable.


