


Views: 0 Author: Site Editor Publish Time: 2026-08-27 Origin: Site


Achieving natural optical vitality in restorative dentistry requires a precise mathematical and material balance, particularly when managing light transmission through thin ceramic layers. Clinicians and dental technicians face a persistent challenge: balancing the need for high translucency to mimic natural enamel with the necessity of sufficient thickness to mask underlying discolored abutments and ensure structural longevity. Understanding the exact correlation between material thickness, light irradiance, and substrate masking is critical for prescribing the correct parameters for glass ceramic veneers. This guide breaks down the evidence-based evaluation criteria for specifying thickness in modern veneer cases. We will examine how light behaves within crystalline structures, evaluate substrate masking protocols, and outline the exact cementation adjustments required when working with thicker restorations to prevent clinical failures.
Inverse Optical Relationship: Translucency in dental ceramics is primarily dictated by thickness; as material thickness increases, light transmission decreases exponentially, directly impacting the restoration's vitality.
Masking Superiority: Clinical evidence indicates that veneer thickness is a more effective variable for masking dark underlying substrates than altering the translucency or shade of the ceramic material itself.
Cementation Risks: Veneer thicknesses approaching or exceeding 1.0 mm significantly reduce light irradiance during cementation, negatively impacting the Degree of Conversion (DC) of light-cured resin cements.
Aging Factors: Long-term clinical performance models show that aging naturally decreases the translucency of ceramic materials, a factor that must be accounted for during initial thickness and shade selection.
Optical success in restorative dentistry relies on predictable light behavior. Dental professionals and material scientists use specific metrics to quantify this behavior, primarily the Translucency Parameter (TP) and Contrast Ratio (CR). TP measures the color difference of a material of a specific thickness when placed over a black background versus a white background using a spectrophotometer. A higher TP indicates greater translucency, meaning more light passes through the material. CR measures the opacity of a material on a scale from 0.0 to 1.0. A CR of 0.0 means the material is completely transparent, while a CR of 1.0 means it is completely opaque. These metrics allow dental technicians to predict how a restoration will interact with light in the oral environment.
Clinical findings consistently demonstrate a fundamental rule of dental materials: thickness is the single most significant factor affecting light transmission. It overrides minor variations in material composition and even the inherent translucency of the chosen ceramic block. As you increase the thickness of a ceramic layer, light transmission drops exponentially, not linearly. A 0.3 mm layer of a specific ceramic behaves vastly differently than a 0.8 mm layer of the exact same material. You cannot simply rely on the manufacturer's shade designation to control light dynamics; you must engineer the thickness to achieve the desired optical result.
Modern lithium disilicate ceramics interact with light differently than traditional feldspathic porcelain. Lithium disilicate features a unique crystalline structure consisting of needle-like crystals interlocking within a glassy matrix. During the crystallization process, these crystals grow to approximately 1.5 to 3 microns in length. This specific size and arrangement scatter visible light internally. The internal scattering creates a natural, lifelike appearance that mimics the light-scattering properties of natural human enamel and dentin. Traditional feldspathic porcelain relies heavily on surface reflection and manual layering to achieve depth, whereas lithium disilicate manages light depth inherently through its microstructure.
However, this internal scattering is highly dependent on the thickness of the restoration. At very thin profiles (around 0.3 mm to 0.4 mm), lithium disilicate allows significant light to pass through with minimal scattering. It blends seamlessly with the underlying tooth structure, acting almost like a contact lens. As the material gets thicker, the sheer volume of interlocking crystals scatters more light, reducing the overall translucency and increasing the value (brightness) of the restoration. Clinicians must anticipate how the specific preparation depth will alter the final optical result.
Manufacturers provide different translucency formulations to address varying clinical scenarios. HT and LT ingots serve distinct clinical purposes based on their microstructural properties. HT formulations contain a slightly different crystal density and a higher proportion of the glassy matrix, allowing more light to pass through without being scattered. LT formulations contain a higher density of scattering crystals, which increases opacity and value.
HT ceramics allow light transmission that closely mimics natural enamel. They provide superior depth and optical vitality, preventing a flat or artificial appearance. This makes them ideal for cases where the underlying tooth structure is a healthy, natural shade. However, an HT ingot milled too thick (e.g., over 1.2 mm) will lose its vital appearance and can look grayish or low in value because the light gets lost within the thick glassy matrix. Conversely, an LT ingot provides better masking capabilities. It blocks light from reaching dark underlying tooth structure. Clinicians must choose the right formulation based on the available restorative space and the stump shade.
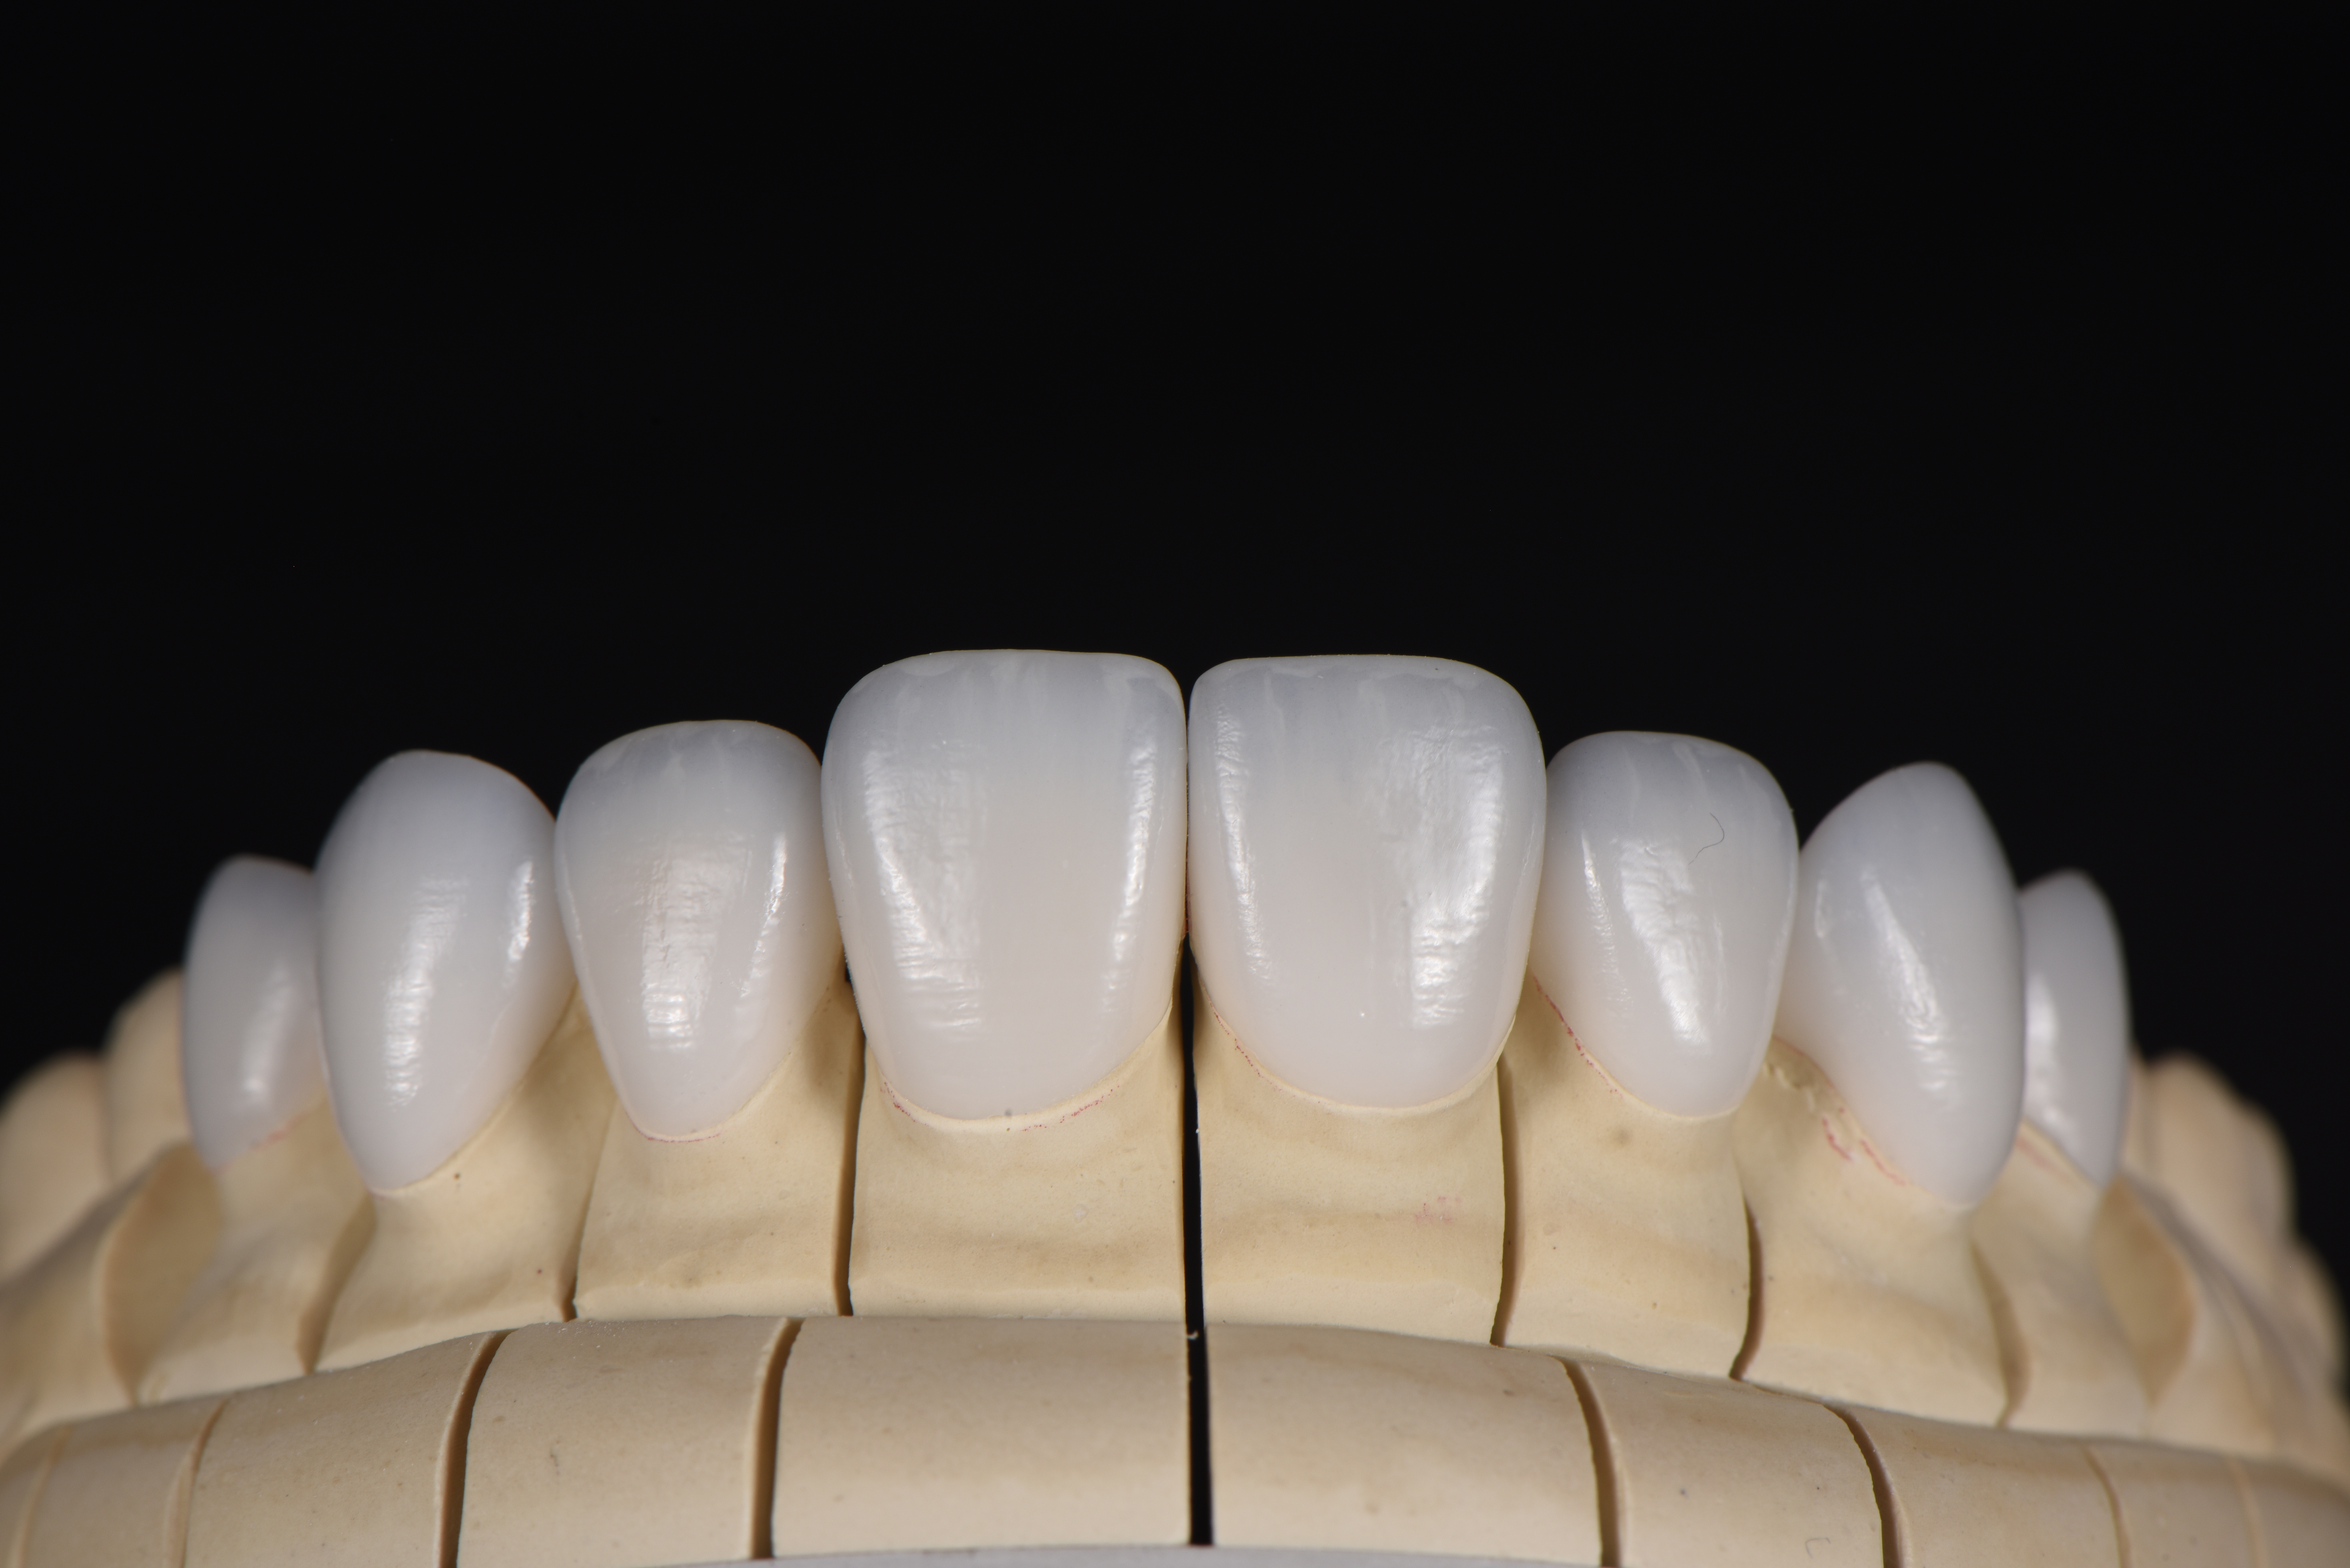
Placing highly translucent porcelain veneers over discolored teeth presents a significant masking challenge. Tetracycline-stained teeth, fluorosis, and endodontically treated teeth often present with dark, non-vital stumps. If you place a thin, highly translucent restoration over these substrates, the darkness will show through. The final result will look gray, lifeless, and clinically unacceptable. Managing the substrate color effectively is the most critical step in the aesthetic planning phase.
Data shows a clear hierarchy in masking strategies. Increasing the thickness of the ceramic is clinically more effective at masking dark substrates than simply switching to a more opaque material shade. A 1.0 mm thick HT material will often mask a moderately discolored stump better than a 0.5 mm thick LT material. Thickness provides the physical barrier needed to block light reflection from the dark stump. When light enters a thick ceramic layer, it scatters and reflects back to the observer before it can reach the dark substrate and be absorbed.
Achieving both depth of color and adequate masking requires careful spatial planning. You must define the optimal ratio between the core material and the veneering ceramic, especially when utilizing a cut-back and layer technique. In layered restorations, the opaque core (usually lithium disilicate or zirconia) blocks the dark substrate, while the translucent veneering ceramic (fluorapatite or feldspathic porcelain) provides the lifelike enamel layer. The total restorative space dictates how much of each layer you can use.
Ultra-thin preparations present severe limitations for masking. A 0.3 mm preparation leaves almost no room for optical manipulation. If significant color shifts are required (e.g., moving from an A4 stump to a BL2 final shade), an ultra-thin preparation will fail. You cannot fit an opaque core and a translucent enamel layer into 0.3 mm. You must prepare the tooth deeper to create the necessary space. A 0.8 mm to 1.0 mm preparation allows for proper core-veneer ratios, ensuring both structural masking and optical vitality.
Clinical Masking Strategy and Thickness Guide
Substrate Condition (Stump Shade) | Recommended Material Formulation | Minimum Required Thickness | Expected Optical Outcome |
|---|---|---|---|
Light/Normal Enamel (ND1 - ND2) | High Translucency (HT) | 0.3 mm - 0.5 mm | High vitality, seamless blending, natural depth. |
Mild Discoloration (ND3 - ND4) | Medium Translucency (MT) or Low Translucency (LT) | 0.5 mm - 0.7 mm | Good masking, moderate vitality, slight opacity increase. |
Severe Staining (ND5 - ND7) | Low Translucency (LT) or Medium Opacity (MO) | 0.8 mm - 1.2 mm | Complete masking, lower inherent vitality, requires surface characterization. |
Extreme Discoloration / Metal Core (ND8 - ND9) | High Opacity (HO) Core + Layered Ceramic | 1.2 mm - 1.5 mm | Total light block, relies entirely on layered porcelain for aesthetic depth. |
Clinicians must balance optical desires with structural realities. porcelain laminate veneers must withstand significant forces in the anterior region. Shear and tensile forces during mastication, incisal guidance, and parafunctional habits can cause catastrophic failure if the material is too thin. You must establish baseline thickness parameters to prevent cohesive fractures. While a 0.2 mm restoration might look incredibly natural on a cast, it lacks the flexural strength to survive long-term function in the mouth.
The standard minimum thickness for pressed or milled lithium disilicate is generally 0.3 mm. However, this applies only to cases with ideal enamel bonding, minimal functional risk, and no parafunctional habits. For most standard cases, a thickness of 0.5 mm to 0.7 mm provides a much safer structural margin. This thickness resists flexural fatigue over millions of chewing cycles. It also provides enough volume for the dental technician to create internal effects and proper emergence profiles. You must evaluate the patient's occlusion, overjet, and overbite before prescribing ultra-thin restorations.
Many clinicians assume the final glaze firing will fix optical shortcomings or increase the masking ability of a thin restoration. Clinical studies indicate otherwise. The thickness of ceramic laminate restorations does not affect its translucency and color change after glazing. The final glazing process offers negligible optical correction regarding light transmission. It seals the surface, fills micro-porosities, and provides a natural gloss, but it does not change the fundamental light transmission properties established by the material's thickness and crystalline structure.
This confirms a critical workflow requirement: optical properties must be locked in during the milling or pressing phase. The initial thickness specification dictates the final result. You cannot mill a restoration too thin and expect the glaze or surface stains to add true opacity; they will only lower the value and make the tooth look dirty. You cannot mill it too thick and expect the glaze to increase translucency. You must engineer the thickness correctly from the start.
Long-term optical stability is a major concern for custom glass ceramic veneers. The oral environment is harsh. Restorations undergo constant thermal cycling, chemical exposure from acidic foods, and mechanical wear. Simulated aging studies reveal a concerning trend: aging naturally decreases the translucency of ceramic materials. The glassy matrix undergoes slight hydrolytic degradation over time. The surface texture changes as the glaze wears off, altering light reflection and scattering.
Clinicians must plan for these minor optical shifts. A restoration designed for a 10-to-15-year lifecycle will not look exactly the same in year ten as it did on day one. If you design a restoration to be perfectly translucent at the time of cementation, it may become slightly opaque and lower in value over time. Factoring in this degradation helps ensure long-term patient satisfaction. Selecting a slightly higher translucency initially or ensuring adequate thickness for a robust polish can help compensate for future aging effects.
The thickness of the ceramic directly impacts the cementation process, specifically the photopolymerization of the resin cement. Light irradiance attenuation is a significant physical hurdle. As the curing light passes through the ceramic layer, it scatters and absorbs. The ceramic matrix deflects the photons, preventing them from reaching the cement layer. The light energy degrades exponentially. A curing light emitting 1200 mW/cm² at the tip may only deliver 300 mW/cm² or less through a 1.0 mm thick ceramic layer, especially if it is an LT or MO formulation.
This attenuation presents a major clinical risk. You must evaluate the initial curing light irradiance levels using a radiometer. You must also understand how they degrade through the specific ceramic medium you are using. Darker shades and more opaque formulations attenuate light much more than lighter, translucent materials. Ignoring this physical reality leads to catastrophic cementation failure.
The most critical risk involves the Degree of Conversion (DC) of the resin cement. DC refers to the percentage of resin monomers that convert into polymer chains during the curing process. A high DC (typically above 50-60%) ensures optimal physical properties of the cement, including high bond strength, low solubility, and color stability. Veneer thicknesses at or above 1.0 mm have a documented negative influence on the DC of purely light-cured resin cements.
The clinical consequences of incomplete curing are severe. A low DC leads to microleakage at the margins. Bacteria and oral fluids infiltrate the uncured cement layer, causing recurrent decay and sensitivity. Incomplete curing also leads to debonding, where the restoration simply falls off under minimal force. Furthermore, uncured resin monomers are highly susceptible to water sorption and marginal discoloration. A beautiful restoration can develop dark brown margins within months if the cement is not fully polymerized.
You must implement specific protocols for managing thick restorations to ensure complete polymerization.
Utilize dual-cure resin cements for any restoration exceeding 0.7 mm in thickness. Dual-cure cements contain chemical initiators that continue to polymerize the cement even if light penetration is inadequate, providing a critical safety net.
Increase curing time significantly. If you use a strictly light-cured cement, double or triple the manufacturer's recommended curing time for thick restorations. Cure for 40 to 60 seconds per surface (buccal, lingual, incisal).
Move the curing tip to multiple angles to ensure maximum light penetration through different aspects of the restoration.
Utilize high-output curing lights (minimum 1000 mW/cm²) to compensate for irradiance loss. Ensure your curing light is properly maintained, free of debris on the tip, and regularly tested for output accuracy.
Successful outcomes require a rigorous decision framework starting from the initial consultation. Case selection is the first critical step. You must evaluate the substrate meticulously before touching a bur to the tooth. Assess the stump shade prior to preparation using a standardized shade guide designed specifically for prepared teeth (e.g., the IPS Natural Die Material guide). Photograph the stump shade with cross-polarizing filters. This removes specular reflection and glare, revealing the true underlying color and chroma. This step determines the exact masking power required.
Space management is the next crucial phase. Determine if additive or subtractive preparation is required based on a digital or analog diagnostic wax-up. Additive preparations work well for worn dentition or lingually positioned teeth. They allow you to build thickness without removing healthy tooth structure. Subtractive preparations are necessary when significant color shifts are required or when teeth are facially positioned. You must remove enough tooth structure to achieve the necessary thickness for the desired optical outcome without violating biologic width or exposing excessive dentin.
Accurate lab communication prevents costly remakes and clinical frustration. The dental technician cannot guess the clinical conditions; they only know what you provide. You must accurately communicate the stump shade, the desired final shade, and the available restorative space.
Provide high-quality photographs showing the preparation from multiple angles, including occlusal views to show facial reduction.
Include a periodontal probe in the photograph to provide a scale reference for the technician.
Specify the exact thickness of the preparation in your lab script (e.g., "0.8 mm facial reduction achieved").
Balance the prescription based on the required thickness. Decide between monolithic lithium disilicate and layered restorations. Monolithic restorations offer superior strength and are ideal for areas with high functional stress or limited space. Layered restorations offer superior aesthetics and are ideal for complex anterior cases requiring internal characterization, provided you have prepared at least 0.8 mm to 1.0 mm of space.
Specifying the thickness of ceramic restorations is not merely a structural decision; it is the primary driver of the restoration's optical success. Thickness dictates light transmission, masking ability, and cementation viability. You cannot separate the physical dimensions of the preparation from the aesthetic outcome. A thorough understanding of these principles elevates the predictability and quality of your restorative dentistry, ensuring restorations that look natural and survive long-term function.
The shortlisting logic for material selection is straightforward. Utilize ultra-thin (0.3 mm - 0.5 mm) high-translucency materials for cases with favorable substrate shades to maximize vitality and preserve tooth structure. Mandate thicker (0.8 mm - 1.0 mm) low-translucency materials when masking is the primary clinical objective. Do not compromise masking ability for the sake of conservative preparation if the substrate is severely discolored.
Standardize your stump shade photography using cross-polarizing filters for every anterior case before finalizing the preparation.
Integrate thickness-to-translucency calculations into your digital smile design workflows to determine exact reduction requirements.
Upgrade your curing light protocols to include extended times and dual-cure cements for any restoration exceeding 0.7 mm in thickness.
Specify the exact required material thickness and stump shade on all laboratory prescriptions to ensure predictable optical outcomes.
A: The standard range is 0.3 mm to 1.0 mm. However, the ideal thickness depends entirely on the underlying tooth shade and required structural integrity. A 0.3 mm thickness works for minor contour changes on light teeth. A 1.0 mm thickness is necessary for masking dark, discolored stumps and providing structural durability.
A: Increasing thickness is clinically proven to be more effective at hiding discoloration than simply changing the ceramic shade. A thicker layer provides a physical barrier that blocks light reflection from the dark substrate beneath, preventing a grayish appearance and allowing the ceramic's true color to show.
A: No. Clinical evidence shows that the final glazing process has a negligible effect on overall translucency and color change. The optical properties are determined by the material's thickness and formulation during the initial milling or pressing phase, not the final surface glaze.
A: Yes. Ultra-thin restorations face significant risks. They are prone to structural failure under functional loads. They also lack the volume required to mask underlying discoloration effectively. Furthermore, they are extremely fragile and difficult to handle during the try-in and cementation process.
A: Aging causes a natural degradation of translucency over time. Intraoral factors, including thermal cycling, wear, and chemical exposure, slightly alter the ceramic's glassy matrix. This results in a gradual decrease in light transmission, making the restoration appear slightly more opaque over its lifespan.
A: Yes. There is a strong negative correlation between increased ceramic thickness and the Degree of Conversion for light-cured resin cements. Thicknesses at or above 1.0 mm severely attenuate light irradiance, increasing the risk of incomplete curing, microleakage, marginal staining, and debonding.


