


Views: 0 Author: Site Editor Publish Time: 2026-08-21 Origin: Site


Shade consistency goes far beyond basic clinical requirements. You must view it as a critical business metric. Shade-related remakes cost valuable chair time. They delay active treatment plans. They heavily compromise patient trust. Moving from subjective visual guessing to digital predictability demands serious effort. Your clinical practice and the lab must synchronize perfectly. You need accurate data capture and standardized processing protocols.
A reliable dental restoration manufacturer never relies solely on a technician's artistic eye. They deploy strict, objective quality control frameworks instead. They leverage advanced digital colorimetry to eliminate guesswork. They also establish rigid clinic-to-lab communication rules. These protocols guarantee excellent, predictable outcomes every single time. By understanding how a top-tier laboratory controls shade variables, you can streamline your appointments. You will drastically reduce frustration during seating procedures. You will also deliver superior aesthetic results to your patients.
Objective Data Overpowers Subjectivity: Top manufacturers rely on digital colorimetry, spectrophotometers, and cross-polarized photography rather than visual estimation alone.
Material-Specific Protocols Matter: Achieving consistent value and chroma requires different techniques depending on the substrate (e.g., layered ceramics vs. monolithic zirconia).
Communication is the Bottleneck: The most common cause of shade mismatch is poor data input from the clinic; successful manufacturers provide clear SOPs for data capture.
Standard vs. Custom Workflows: Evaluating a partner requires understanding their criteria for scaling standard shade processes versus deploying custom aesthetic matching for high-value cases.
A mismatched restoration creates an immediate ripple effect across your practice. The seating appointment abruptly stops. You must apologize to the patient. You then package the crown for a return trip to the lab. This single failure incurs multiple hidden costs. You lose the initial chair time entirely. You must book an unbillable secondary appointment. Patient confidence drops significantly.
We call this the "Garbage In, Garbage Out" (GIGO) reality. A dental restoration manufacturer can only produce accuracy based on the provided clinical data. If you send a blurry photograph taken under yellow room lighting, the lab must guess the true color. Guesswork leads directly to clinical failure. Accurate shade matching requires a controlled transfer of information.
You must redefine success criteria for your lab partnership. Success is not just a beautiful crown on a plaster model. True success means zero clinical adjustments. It means seating appointments finish in ten minutes. It requires a measurable reduction in your monthly remake percentages. You achieve this predictability only when both clinic and lab share identical standards.
Common Mistake: Tracking your monthly lab invoice totals without simultaneously tracking your shade-related remake costs. The lost production time often outweighs any savings from using a cheaper, less precise lab.
Modern shade matching starts with objective science. High-end laboratories utilize standardized lighting environments. They install overhead bulbs emitting a 5500K color temperature. They require a Color Rendering Index (CRI) above 90. This specific lighting mimics natural daylight. It completely eliminates metamerism. Metamerism happens when two colors match under one light source but clash under another. Technicians also use digital spectrophotometers. These devices read the exact wavelength of the tooth, removing subjective human error.
Once the baseline science is perfect, artistic execution takes over. Machines provide raw data. Technicians provide life. Expert ceramists remain irreplaceable for highly complex aesthetics. They manually mimic internal characterizations. They build subtle mamelons inside the porcelain. They recreate precise surface textures to reflect light naturally. The machine gives them the map, but they paint the territory.
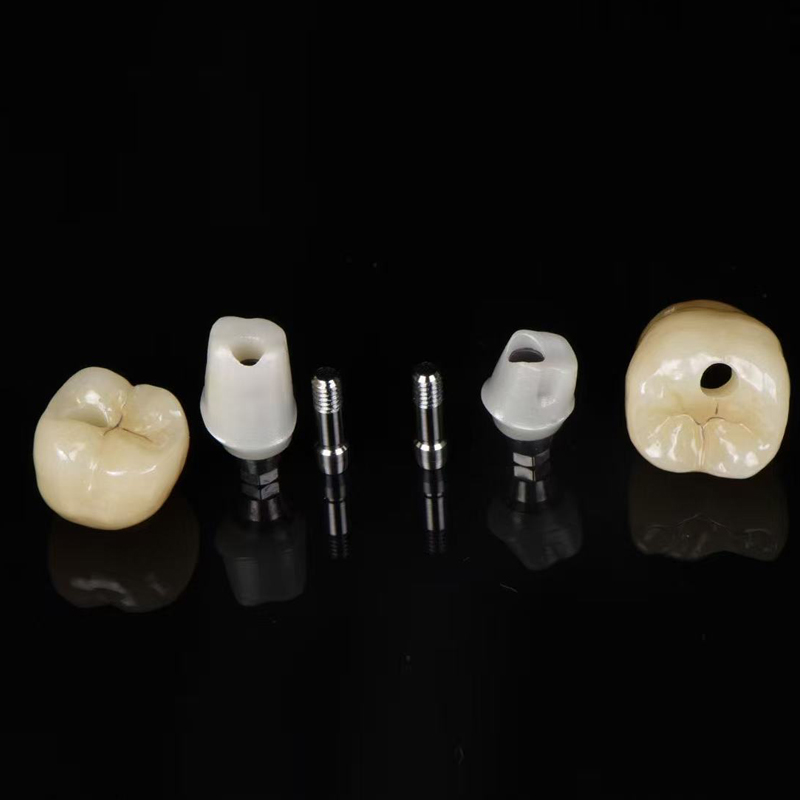
Indication-specific challenges further complicate this process. Different clinical scenarios demand different approaches. For example, an implant restoration manufacturer faces unique physical hurdles. They must frequently account for dark titanium abutments. Natural tooth roots offer warm, dentin-colored backgrounds. Titanium shines through thin ceramics as a dead, gray shadow. The lab must apply specialized gingival masking or opaque substructures. They must block the metal without destroying the final translucency.
Top laboratories process incoming data through standardized digital workflows. They extract base color maps from raw intraoral scanner (IOS) files. They combine this digital scan data with high-resolution DSLR photography. The lab requires these photos to use cross-polarization filters. Polarization instantly eliminates flash glare from the enamel surface. It reveals the true internal dentin shade underneath the reflective glaze.
Substrate and material management forms the next critical phase. A premium zirconia restoration manufacturer exercises intense control over their sintering ovens. Zirconia changes color based on heat exposure. If the oven temperature fluctuates slightly, the final chroma shifts. Technicians must also apply liquid ceramics or precise surface stains before the final bake.
Thickness considerations play a massive role here. A technician always calculates the preparation depth. They factor in the stump shade provided by the dentist. Thin restorations placed over dark stumps experience a severe drop in value. The crown looks gray in the mouth. Careful material selection prevents this specific failure.
Finally, labs execute multi-tier verification before shipping any case. They do not just glance at the final crown. They follow a rigorous, documented process.
Table 1: Multi-Tier Verification Process in Advanced Dental Labs
Verification Tier | Equipment Used | Primary Objective |
|---|---|---|
Tier 1: Digital Baseline | IOS Software & Spectrophotometer Data | Confirm base chroma and value match the initial clinical prescription. |
Tier 2: Polarization Check | Cross-polarized Reference Photos | Verify internal characterization, mamelon structure, and incisal translucency. |
Tier 3: Physical Environment | 5500K / >90 CRI Standardized Lighting | Compare final restoration against physical shade guides to eliminate metamerism. |
Evaluating a manufacturing partner requires understanding their scalable processes. You must know how they handle everyday cases versus complex aesthetic challenges. They separate these into standard and custom workflows.
Standard shade matching works beautifully for posterior restorations. It also applies to full-arch acrylic cases. A specialized removable denture manufacturer standardizes high-volume workflows using universally calibrated guides. They typically use the VITA classical or VITA 3D-Master systems. They mix acrylics to match these strict global standards. This ensures that every replacement tooth perfectly matches the existing denture base. Standard matching prioritizes speed, baseline accuracy, and high durability.
Custom shade matching is mandatory for high-demand anterior cases. A single central incisor represents the hardest challenge in dentistry. A dedicated dental veneer manufacturer utilizes detailed regional shade mapping for these cases. They do not accept a single shade like "A2". Instead, they map the cervical, middle, and incisal thirds independently. They develop custom staining protocols to seamlessly blend the veneer with adjacent natural dentition. They recreate hypocalcification spots, craze lines, and precise halo effects.
Standard vs. Custom Workflow Chart
Feature | Standard Workflow | Custom Workflow |
|---|---|---|
Primary Indication | Posterior crowns, full dentures | Anterior veneers, single central incisors |
Data Requirement | Basic shade tab (e.g., A2, B1) | Regional mapping, stump shade, polarized photos |
Lab Execution | Monolithic materials, basic glazing | Layered ceramics, internal characterization |
Turnaround Time | Fast (High-volume scalability) | Extended (Requires master ceramist) |
You must evaluate lab capacity carefully. Ask if the manufacturer operates a dedicated aesthetic team. Complex custom requests should never bottleneck their general production lines. A well-structured lab separates these workflows entirely.
Even the best lab fails if the clinical data is flawed. You must address frequent errors causing shade discrepancies. The most common clinical pitfall is tooth dehydration. Enamel loses water rapidly once isolated. Dehydrated teeth appear significantly whiter and more opaque. If you take the shade photo at the end of a long preparation appointment, the lab will match a false color. The final crown will look too bright.
Improper background selection also ruins data. Brightly colored patient napkins distract the camera sensor. The camera automatically adjusts its white balance, distorting the tooth color. Expired physical shade guides pose another massive risk. Plastic and porcelain tabs fade over years of chemical disinfection.
Top-tier manufacturers demand strict Standard Operating Procedure (SOP) integration from your practice. They usually require the following steps:
Mandatory Stump Shades: Capture the color of the underlying preparation before placing temporary crowns.
Immediate Photography: Take all shade reference photos before administering anesthesia or isolating the teeth.
Focal Plane Alignment: Hold the shade tab in the exact same focal plane as the natural tooth. Angling the tab catches artificial glare.
Reference Visibility: Ensure the shade tab's identifying label remains clearly visible in the raw photograph.
Constructive feedback loops define a great partnership. A premium manufacturer provides honest feedback on incoming case data. They refuse to blindly process inadequate inputs. If your photo is blurry, they call you immediately. They pause production rather than guessing and risking a remake.
Best Practice: Keep a neutral gray card in your operatory. Hold it next to the patient's face for one calibration photo. The lab uses this card to color-correct the entire batch of images instantly.
Choosing a new laboratory requires a methodical vetting process. You cannot rely on marketing brochures alone. You must ask highly specific verification questions during the interview phase. Start by asking, "What specific digital shade matching software and hardware do your technicians use?" If they cannot name their spectrophotometer or lighting standards, look elsewhere. Next, ask, "Can you provide your standard operating procedure for clinical photography submissions?" A highly organized lab will immediately hand you a documented PDF guide.
Pilot testing is essential for evaluating true capabilities. Never send a highly aesthetic anterior case as your first interaction. Recommend sending three to five posterior cases initially. Evaluate their baseline shade accuracy. Check their margin adaptations and their default contact tightness. Once they prove consistency on standard workflows, you can safely transition to demanding anterior aesthetics.
Watch out for obvious red flags. Warn your team against manufacturers who guarantee 100% accuracy without requesting stump shades. Be skeptical of labs that never ask for high-quality photographic evidence. These companies operate on volume, not precision. They plan to absorb the cost of remakes rather than preventing them entirely.
Shade consistency relies entirely on a systemic approach. It stems from controlled lighting, digital integration, precise material protocols, and rigid clinic-lab communication. You cannot achieve predictability through guesswork. You need objective data.
A true manufacturing partner acts as a direct extension of your clinical team. They proactively manage aesthetic risks rather than reactively remaking failed crowns. They elevate your standard of care by demanding excellence at every step of the data transfer.
Take proactive steps today to improve your workflows. Request a sample kit from a prospective lab to inspect their baseline ceramics. Review their clinical photography guidelines with your dental assistants. Schedule a dedicated consultation to discuss communication protocols before your next complex aesthetic case.
A: The underlying preparation color directly alters the final shade. Highly translucent materials like lithium disilicate or certain zirconias allow light to pass through. If the stump is dark or metallic, it lowers the overall value of the restoration, making it appear gray. Providing the stump shade allows the lab to adjust the material opacity or apply masking layers.
A: This phenomenon is called metamerism. Colors appear differently under varying light sources. A crown may perfectly match under the lab's daylight bulbs but look yellow under your clinic's fluorescent lights. Evaluating restorations under matching 5500K standardized lighting in both environments completely eliminates this optical illusion.
A: Modern IOS systems provide excellent baseline shade maps and analyze overall tooth value. However, they cannot replace cross-polarized DSLR photography. High-resolution photography remains the gold standard for communicating subtle internal characterizations, mamelon structures, and incisal translucency to the ceramist.


